Rabi-Ribi Map Editor
A Guide to Rabi-Ribi Map Editing
Project maintained by wcko87 Hosted on GitHub Pages — Theme by mattgraham
Using the Tiled Map Editor for Rabi-Ribi
Important Notes!
Please read all of the following points carefully before getting started!
Tiled is a pretty flexible map editor, and can do a lot of things not accepted by the Rabi-Ribi game. Using the editor in the wrong way can cause either the converter to crash, or the map files to not work as expected.
-
If you are deleting tiles, don’t use the blank tiles in the tileset. actually erase them properly with the erase tool (E)
-
Don’t ever put collision tiles in the tile layers (tile0 to tile6) or graphical tiles in the collision layer. I have no idea what happens if you do, and it probably won’t be good.
-
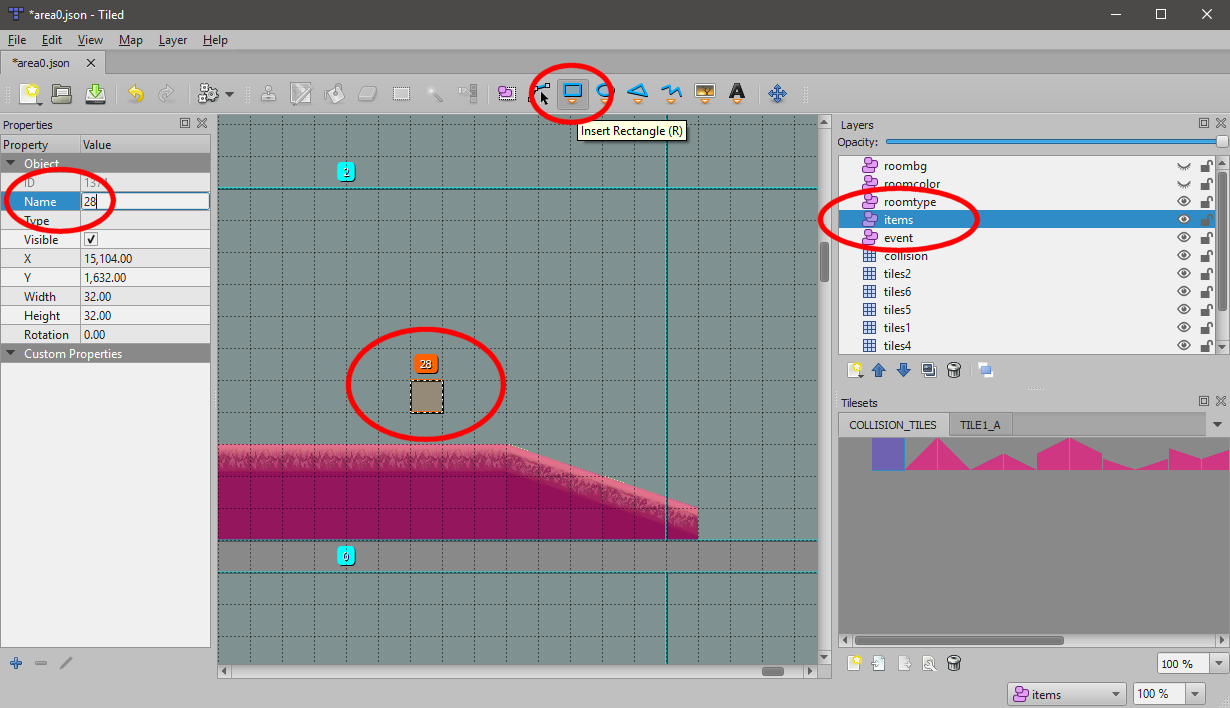
To create events and items, use the “rectangle” tool to create a 1-tile box where the event should be, and name the tile with the Event ID. (the name can be set on the properties panel on the left). If done correctly, the event id should show up above the tile.
-
Do not name an event or tileid something that is not a number. It will cause the converter to crash.
-
Make sure you turn on View -> Snapping -> Snap to Grid (otherwise the events/items can be placed in floating positions, which will cause problems in conversion.)
-
Minimap data layers (roomcolor, roomtype, roombg) are hidden by default. click the eye icon next to the layers to toggle on their visibility. they work similar to events/items. Set their names to other numbers to change their values.
-
Do not delete/move/insert any objects in the minimap data layers. Only change their names.
-
You can re-order the layers in the editor for viewing convenience, they will not affect anything. but do not rename the layers.(edited)
-
Don’t mess with map settings like map size.
-
Press X to flip a tile by the x-axis, Y to flip by the y-axis. Do not rotate tiles. Do not flip collision tiles.
Quick Start Guide
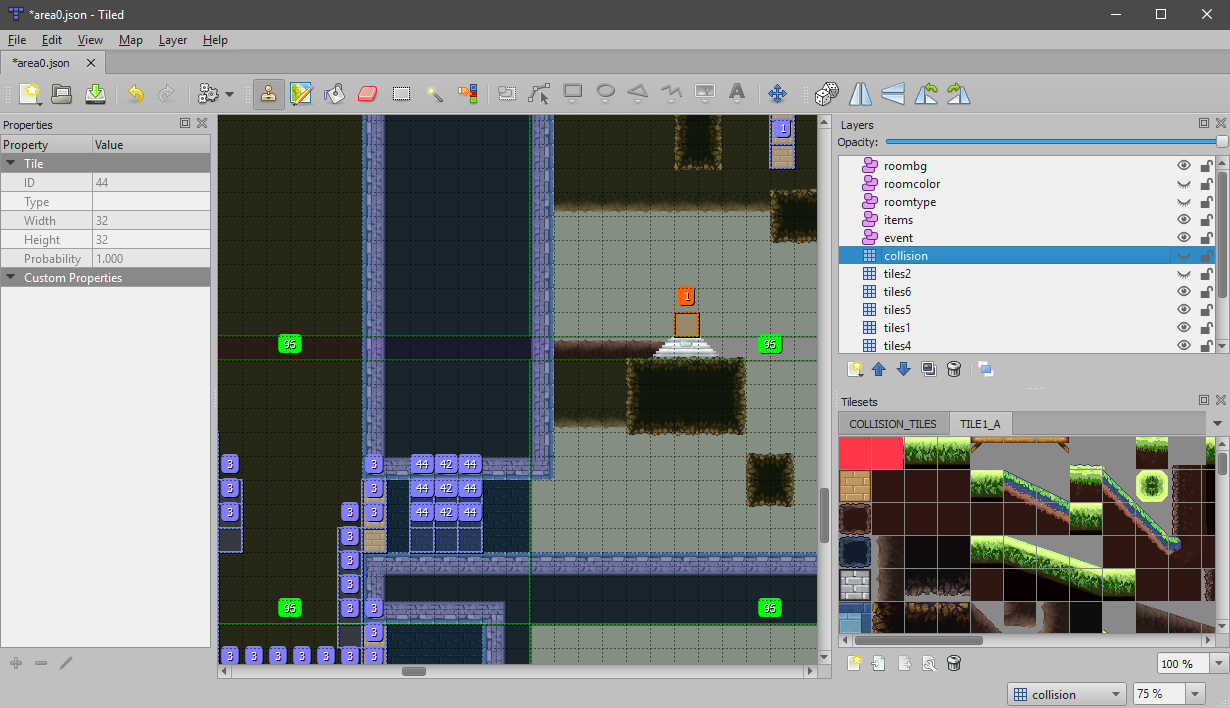
When you open a map in Tiled, you should see something like this.
The map data is stored in layers. The layer panel is on the right, and looks like the below image:
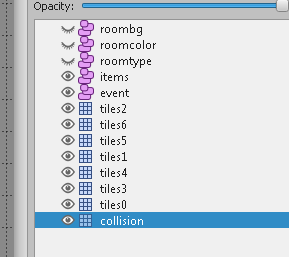
Note: You can re-order the layers in the menu, and hide/unhide layers. But do not rename any of the layers. Renaming the layers will cause the map conversion to fail.
More information on layers: Tile Layer Draw Order
Adding Tiles
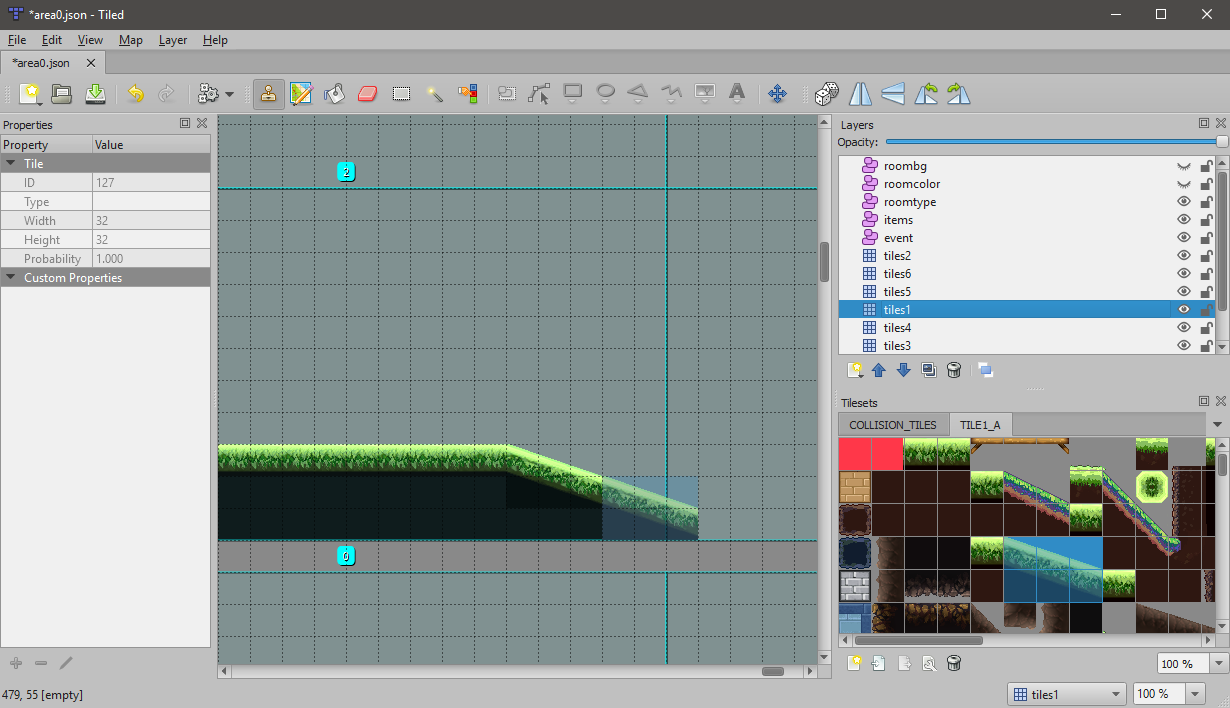
There are 7 tile layers, tiles0 to tiles6. These layers store tile data you can see in-game. The main layer you should be adding tiles to is tiles1. More details on the layers can be found in the detailed docs.
Here we take tiles from the tileset and add them to the tiles1 layer.
Note: Press X to flip a tile by the x-axis, Y to flip by the y-axis. Do not rotate tiles. Do not flip collision tiles.
Adding Collision
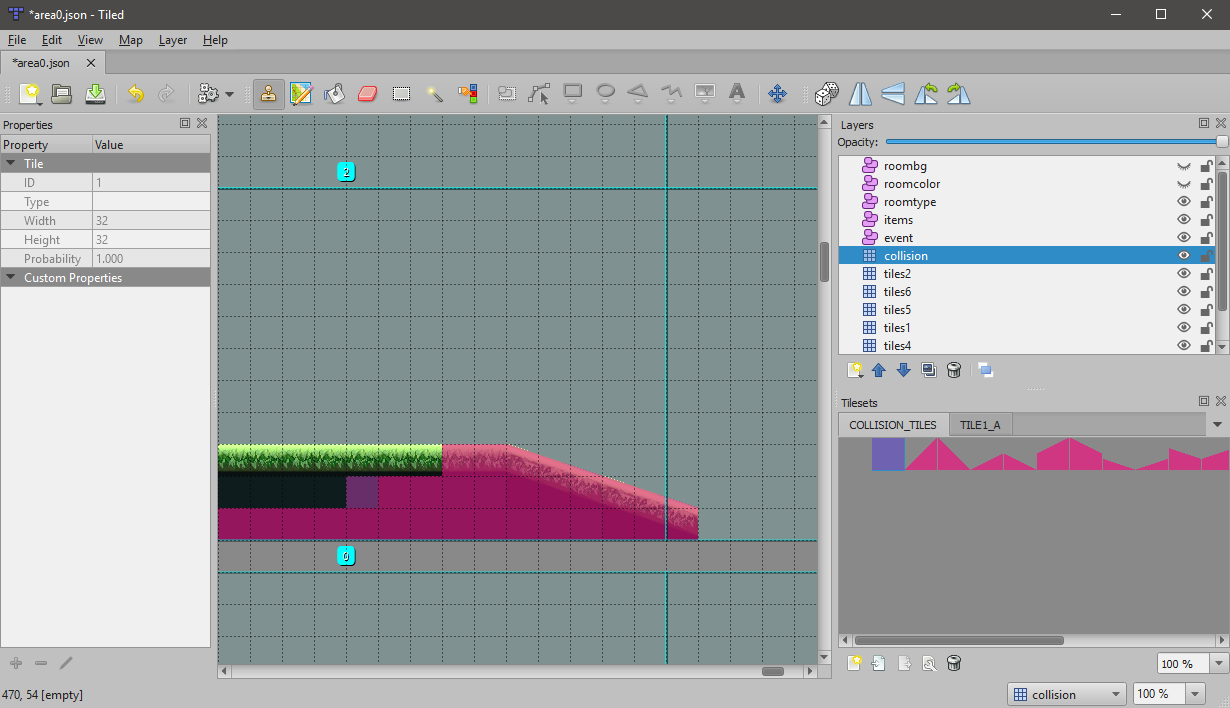
Tile layers are purely visual. For Erina to collide with the floor, you need to add collision tiles to the collision layer.
Note: Do not add collision data to tile layers, or tile data to the collision layer.
Adding Items
Before we add items and events, make sure View -> Snapping -> Snap to Grid is turned on, like in the image below:
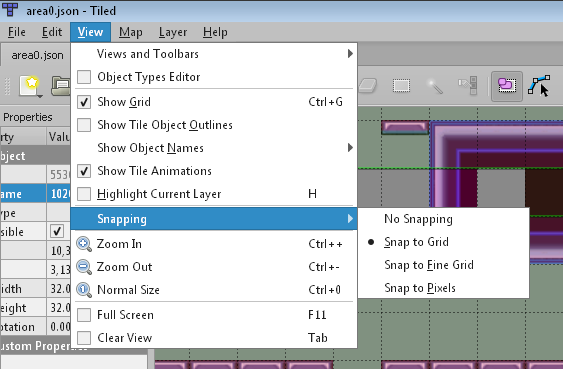
If Snap to Grid is not on, there will be conversion errors later.
To add items, we switch to the items object layer. To create a new item, use the Rectangle tool to create a 1-tile rectangle. Name the rectangle with the Item ID of the item you want. A list of Item IDs can be found in the detailed documentation.
Alternatively, you can copy-paste an existing item object and simply change the name.
Adding Events
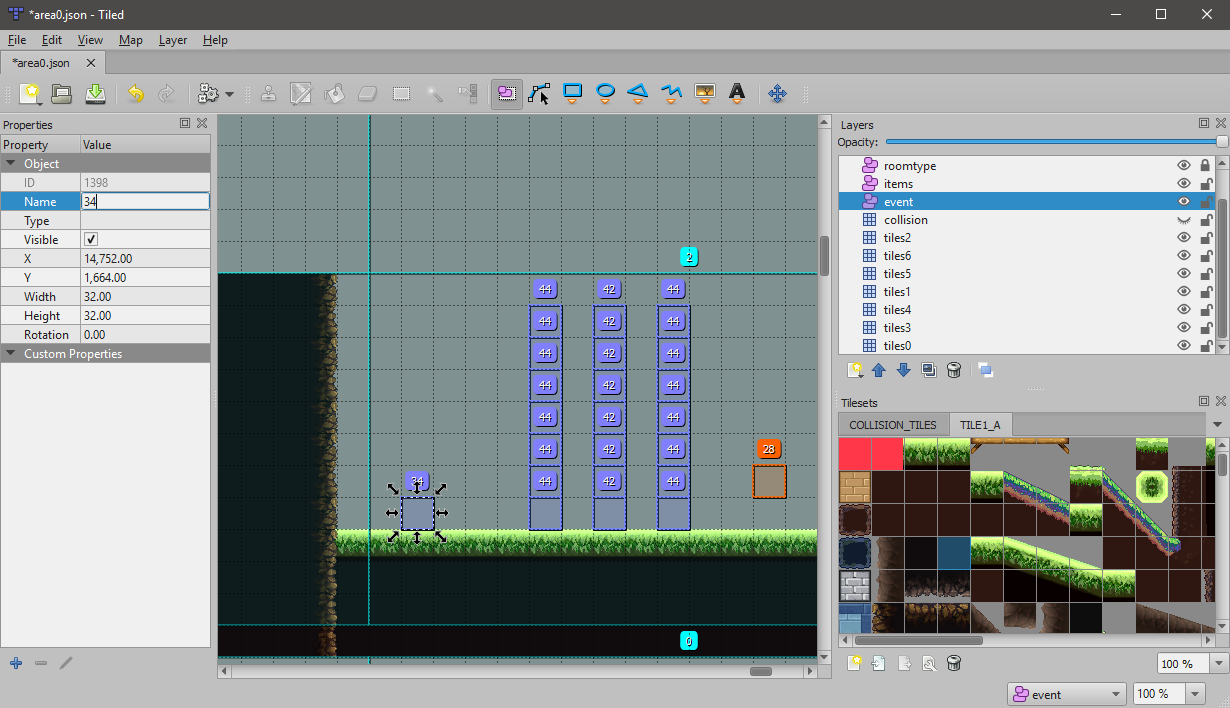
Almost everything else in the game is an event. More details on events will be explained later. To add an event, we switch to the event object layer. Create events the same way you create items.
In the following image, we create a “Start Point” event (event id 34), and a column of autosave events. (42 is an autosave event, and 44 is a no-save event, which allows autosave events to be triggered again)
Editing Room Data
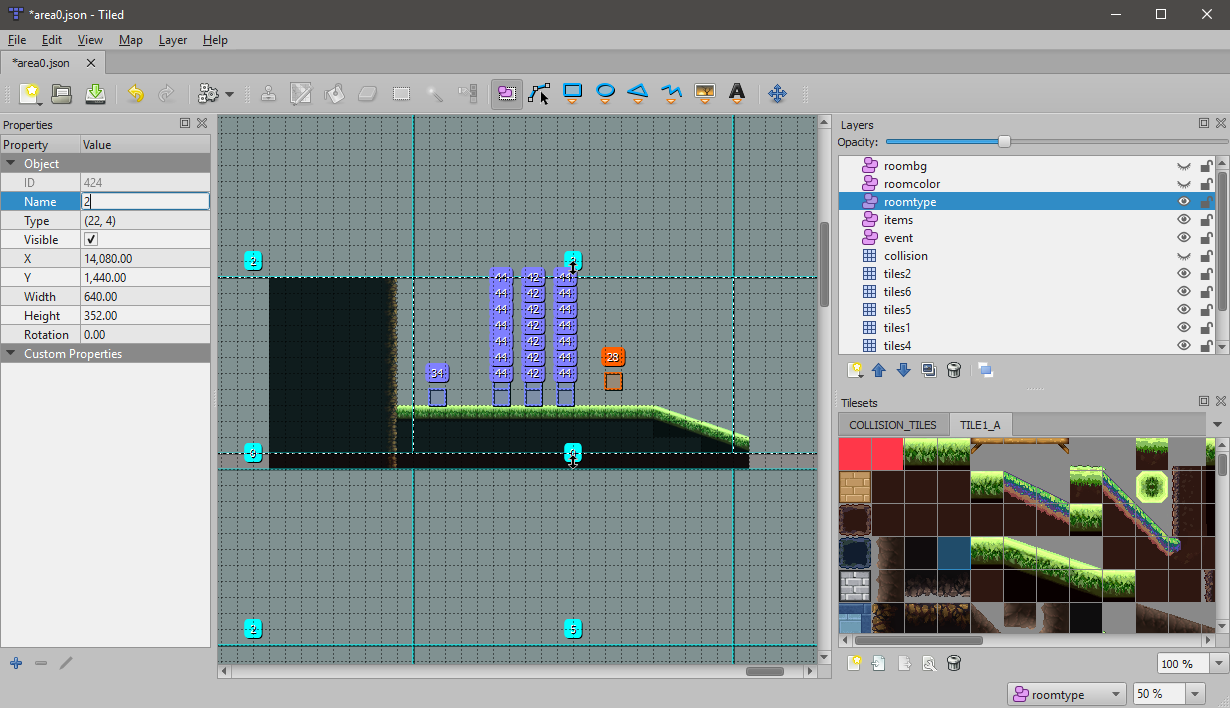
Finally, you can also edit room types, room colors and room backgrounds. The most important of the three is room types. Room types affect how the camera scrolls in the rooms.
In this case, we want to turn these rooms into a single long room. We do this going to the roomtype layer, selecting the rooms we want to change, and change the names of these objects to “2”. Room type 2 represents long horizontal rooms. More information on room types can be found in the detailed docs.
Note: Do not delete any objects in the roombg, roomcolor or roomtype layers. You should only change the names of the objects.
The following section will explain more about Object Layers (events, items, roombg, roomcolor, roomtype).
Understanding Object Layers
When you first open up the map editor, you might notice a lot of numbers.
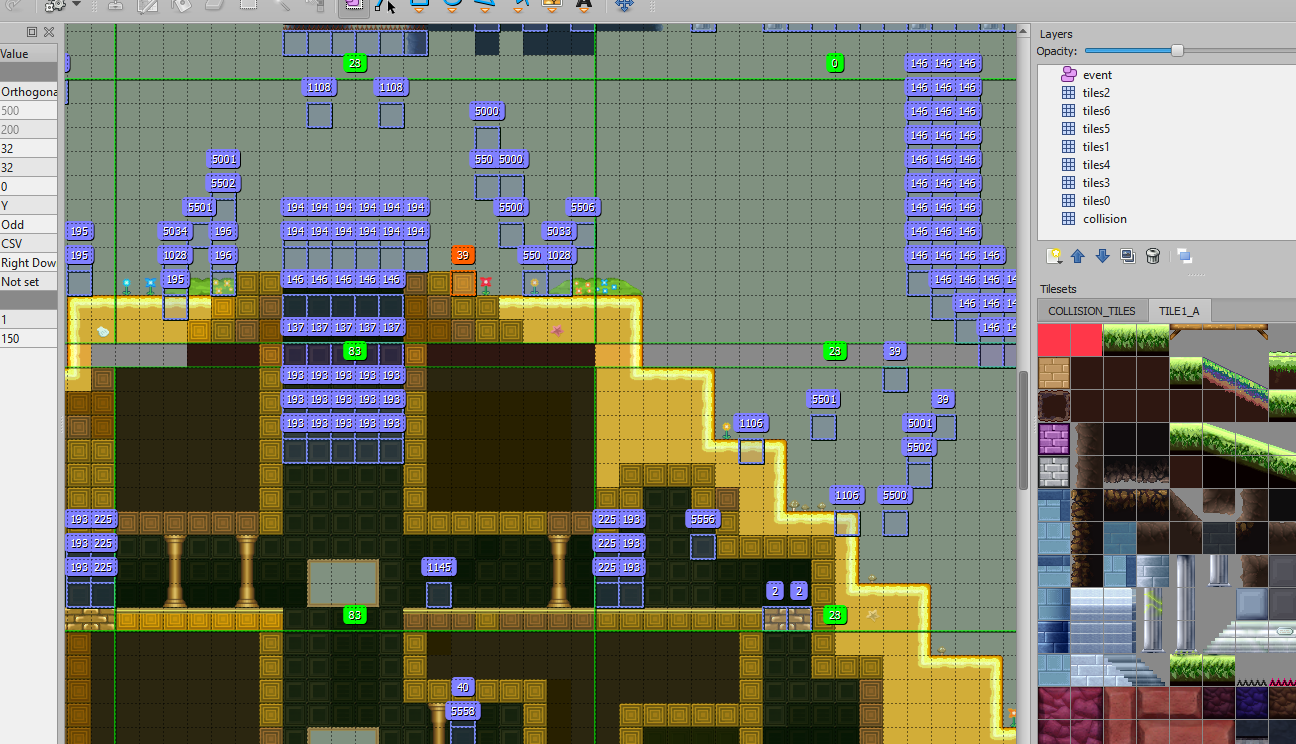
These numbers belong to Object layers. There are five object layers.
events
- Event Triggers. Most of the things that “happen” in game come from event tiles.
Events include, but is not limited to:
- Cutscene Start Triggers
- Boss Triggers
- Music Triggers
- Enemies, and other entities like springs, computers etc.
- Easter Eggs
- Save points, heal points, warp stones
- Bomb blocks, Hammer blocks, ribbon blocks
- Map transitions
- Environmental lighting effects
- etc etc etc…
items
- Item ids. Only items exist in this layer.
roombg
- The background for each room.
roomcolor
- The color of the minimap tile for the room.
roomtype
- Determines if the room is a single room, or a vertical/horizontal/large room, for camera scrolling.
More detailed information on these layers can be found in the Detailed Documentation.